Disclosure: This post may contain affiliate links. Purchases through these links support our site at no extra cost to you.
Look, I know what you’re thinking—making the best pizza dough recipe from scratch is a massive project. It’s not. Honestly, I used to be terrified of yeast until I realized it’s basically just a living science project that wants to make you happy. I’ve been making this exact dough every Friday since 2022. It’s cheap, it’s reliable, and it beats anything you’ll find in the freezer aisle at Walmart. If I can do this in my tiny kitchen with a toddler running around, you can absolutely nail it. Let’s get into it.
📋 In This Article
Why you need to stop buying store-bought crusts
Real talk: those pre-baked pizza crusts at the store are basically cardboard painted with preservatives. They cost about $4.50 for a pack of two, which is insane considering flour and water cost pennies. My recipe costs maybe $1.50 for three large pizzas. You’re paying for convenience, but you’re sacrificing the chew and that perfect, blistered crust. I use King Arthur bread flour because the protein content is higher, which gives you that professional-level stretch. If you can’t find that, any store-brand bread flour works fine, but don’t use cake flour unless you want a pancake-pizza hybrid. It’s honestly not worth the effort to save five minutes if the result is sad. Just trust me on this one.
Related Reading
The flour situation
Stick to bread flour. All-purpose works, but your crust will be soft instead of crispy. I buy the 5lb bag at Costco for about $6.99 and it lasts me months. Just make sure you’re using actual bread flour for the best gluten structure.
The actual process (it’s way easier than you think)
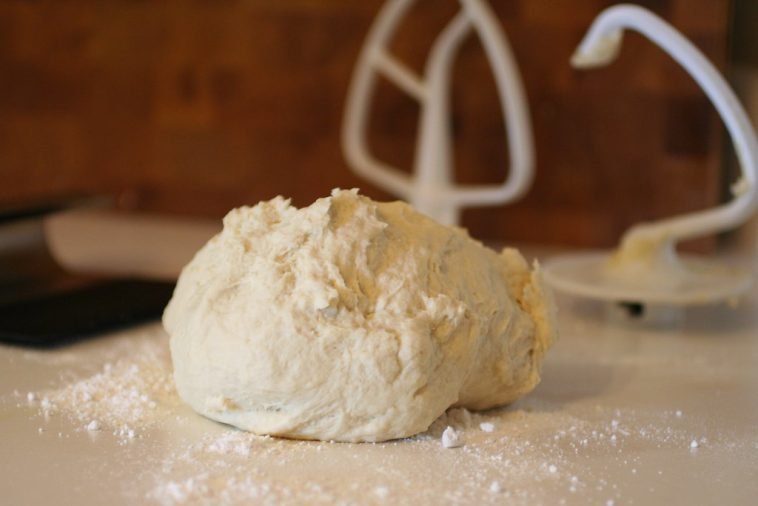
Okay, so you need 500g of bread flour, 350g of warm water, 10g of Diamond Crystal kosher salt, and 3g of instant yeast. That’s it. I mix it all in a big bowl until it’s a shaggy mess, then I let it rest for 20 minutes. This is called an autolyse, and it makes the dough way easier to knead. If you’re feeling lazy, you can skip the rest, but the dough will be harder to work with. I knead it for about 5-7 minutes by hand until it’s smooth. If you have a KitchenAid, use the dough hook on speed 2 for 4 minutes. Done. Move on with your life.
Don’t stress the yeast
I use SAF Instant Yeast because it never fails me. You don’t need to bloom it in water. Just toss it in with the flour and go. If your yeast is old, test it, but otherwise just dump it in and stir.
The secret is the cold ferment
Here’s where it gets interesting. Most people try to bake their dough immediately. Big mistake. You need to let that dough sit in the fridge for at least 24 hours. The flavor develops while it sleeps. I put mine in a sealed container, shove it in the back of the fridge, and forget about it until dinner the next day. It’s actually better after 48 hours, so if you’re planning a pizza night on Saturday, make the dough on Thursday night. It’s a total game-changer for the crust bubbles. Plus, cold dough is much easier to stretch without it tearing. I promise you’ll notice the difference immediately.
Cold storage hacks
Use a clear plastic tub so you can see the bubbles forming. A standard 6-quart Cambro container is perfect. It keeps the dough airtight so it doesn’t dry out and form that gross leathery skin.
Stretching the dough without a panic attack
People get so stressed about making a perfect circle. Who cares? If it looks like a blob, it’s still going to taste like amazing pizza. Take your dough out of the fridge an hour before you bake so it loses the chill. If you try to stretch cold dough, it’ll snap back like a rubber band every single time. Use your fingertips to press the air toward the edges—don’t roll it with a rolling pin! A rolling pin kills all those beautiful air bubbles you just spent 24 hours building. Use your knuckles, gravity, and a little bit of confidence. It’s just flour and water, if you mess up, just ball it back up and try again.
Flour your surface
Use semolina flour to dust your peel or counter. It acts like tiny ball bearings so the pizza slides right off. Do not use regular flour for dusting; it just turns into a gummy paste that sticks to everything.
Baking it like a pro at home
You need heat. Crank your oven to the absolute maximum setting—usually 500°F or 550°F. If you have a pizza stone or a Baking Steel, put it in the oven at least 45 minutes before you start baking. I bought a steel from a local shop for $90, but a stone from Target works too. Slide the pizza on and watch it like a hawk. It usually takes about 6-8 minutes. If you don’t have a stone, use a heavy baking sheet flipped upside down. It’s not quite as good, but it’s still way better than anything that arrives in a cardboard box on your doorstep. Your house is going to smell incredible.
The broiler trick
If your crust isn’t brown enough after 7 minutes, turn the broiler on for the last 60 seconds. Keep an eye on it—it goes from perfect to burnt in about 10 seconds flat.
⭐ Pro Tips
- Always use a kitchen scale. Measuring flour by volume is a recipe for disaster because it’s so easy to pack too much in.
- Buy your yeast in bulk. A 1lb bag of SAF yeast at Costco is like $6, which is cheaper than buying those tiny packets for $2 each.
- Don’t overload your pizza with toppings. Too many toppings = soggy middle. Keep it simple with fresh mozz and basil.
Frequently Asked Questions
Can I freeze pizza dough?
Yes, absolutely. Once the dough has finished its first rise, portion it into balls, coat them in a little olive oil, and put them in freezer bags. They last for about three months.
Is a pizza stone actually worth it?
Yes, 100%. It absorbs moisture and provides that intense bottom heat that your regular oven rack can’t replicate. It’s the single best investment for home pizza makers.
Best flour for pizza dough?
King Arthur Bread Flour is the winner. It has the right protein content to give you that chewy, airy crust you want. Don’t waste your time with cheap all-purpose brands.
Final Thoughts
Look, making pizza is supposed to be fun, not a chore. This recipe takes very little active time, and the results are honestly better than most local shops. Don’t overthink the technique—just get the ratios right and let the fridge do the heavy lifting for you. Go grab some flour and get a batch going for tomorrow. You’re going to be so happy you did when you take that first bite.


GIPHY App Key not set. Please check settings